I’ll never forget the first time I created this incredible banana split cake – it was a game-changer that turned a classic ice cream parlor favorite into a show-stopping dessert. As someone who loves experimenting in the kitchen, I’ve discovered that this no-bake wonder captures all the magic of a traditional banana split in a convenient, slice-able form.
Let me share my journey with this remarkable dessert that combines layers of fresh bananas, crushed pineapple, and cloud-like whipped cream, all nestled on a buttery graham cracker crust. This recipe has become my go-to for everything from summer barbecues to holiday gatherings, and I’m excited to show you why.
What Makes This Banana Split Cake Special?
What I love most about this banana split cake is how it transforms simple ingredients into something extraordinary. The magic begins with a perfectly balanced graham cracker crust that I’ve perfected over countless attempts. I press it firmly into the pan, creating a foundation that’s both sturdy and deliciously crumbly.
The next layer is where I arrange perfectly ripe banana slices – they need to be yellow with just a few brown spots for the best flavor. I follow this with a layer of well-drained crushed pineapple, which adds a tropical brightness that cuts through the richness perfectly.
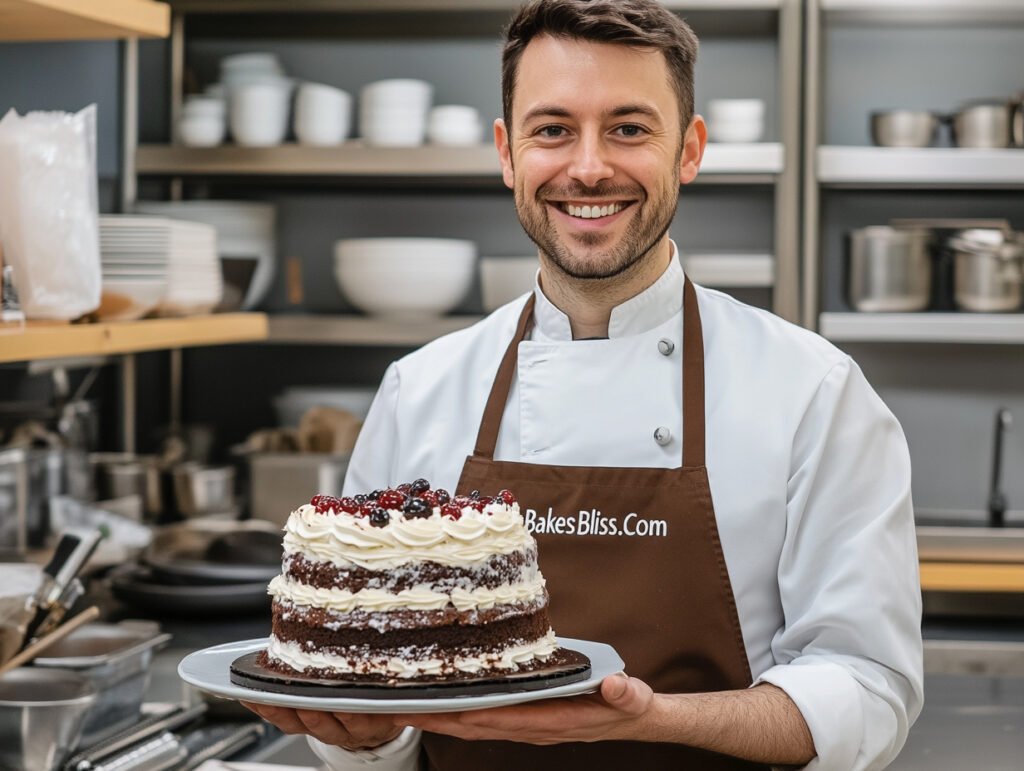
The crowning glory is my special whipped topping layer, which I’ve enhanced with a touch of vanilla extract for extra depth. I finish it all with a triumphant trio of toppings: jewel-like maraschino cherries, crunchy chopped nuts, and a dramatic drizzle of chocolate sauce that makes everyone’s eyes light up when I bring it to the table.
Trust me, once you master this recipe, your dessert reputation will never be the same.
Your Complete Guide to Making The Perfect Banana Split Cake
Everything You Need for a Show-Stopping Banana Split Cake
I’ve spent years perfecting this recipe, and I’m thrilled to share my exact ingredient list and equipment recommendations. Through countless attempts, I’ve found these specific measurements create the perfect balance of flavors and textures.
For the Irresistible Crust
I always start with these foundation ingredients:
- 2 cups graham cracker crumbs (I prefer honey graham crackers)
- 1/2 cup unsalted butter, melted to golden perfection
- 1/4 cup granulated sugar
For My Signature Cream Cheese Layer
This creamy layer is what sets my recipe apart:
- 8 oz cream cheese, softened to room temperature
- 1 cup powdered sugar, sifted for smoothness
- 1 teaspoon pure vanilla extract
- 8 oz whipped topping, thawed completely
My Must-Have Filling and Toppings
These ingredients bring everything together:
- 4-5 perfectly ripe bananas, evenly sliced
- 20 oz can crushed pineapple, well-drained
- 12 oz whipped topping, thawed and divided
- 1/2 cup maraschino cherries, halved for perfect presentation
- 1/2 cup walnuts or pecans, freshly chopped
- Premium chocolate syrup for drizzling
- Rainbow sprinkles (my secret weapon for extra flair)
Essential Equipment From My Kitchen
Through trial and error, I’ve found these tools are crucial for success:
- 9×13-inch Baking Dish – I use a glass dish for the best presentation
- Mixing Bowls – Three medium-sized bowls are perfect for my layering system
- Electric Mixer – This is non-negotiable for achieving my signature smooth cream cheese mixture
- Sturdy Spatula – I recommend a silicone spatula for the smoothest layers
- Measuring Cups & Spoons – Precision is key for my recipe
- Sharp Knife – Essential for those perfect banana slices
- Can Opener – You’ll need this for the pineapple
- Reliable Refrigerator – The magic happens during the chilling process
From my experience, having everything ready before you start makes the assembly process smooth and enjoyable.
Step-by-Step: My Foolproof Method for the Perfect Banana Split Cake
After years of making this beloved dessert, I’ve developed a foolproof process that ensures perfect results every time. Let me walk you through my exact method, step by step.
Creating My Signature Graham Cracker Crust
I start with the foundation:
I pulverize graham crackers into fine crumbs – I prefer using a food processor for consistency, but crushing them in a sealed bag works too
Next, I melt the butter until it’s just liquid, then combine it with my crumbs until the mixture resembles wet sand
Using gentle pressure, I press this mixture evenly into my 9×13-inch dish, making sure to create a solid base
My Secret to the Perfect Cream Cheese Layer
This is where the magic begins:
I always ensure my cream cheese is properly softened – this is crucial for achieving that silky-smooth texture
Using my electric mixer, I beat the cream cheese and powdered sugar until it’s completely smooth and slightly fluffy
Then, I carefully fold in the whipped topping using a gentle hand to maintain maximum fluffiness
Perfecting the Fruit Layers
Here’s how I create those essential fruity layers:
I slice my bananas into uniform rounds – about 1/4 inch thick works best in my experience
These slices get arranged in neat rows over the cream cheese layer
For the pineapple, I drain it extremely well – I actually press it gently to remove excess liquid
The pineapple layer goes on next, spread carefully to ensure even coverage
My Whipped Topping Technique
This layer needs special attention:
I dollop the whipped topping across the surface first, then spread it carefully
Using my offset spatula, I create beautiful, smooth swirls on top
My Signature Finishing Touches
The final flourishes make all the difference:
I place each maraschino cherry with precision, creating an eye-catching pattern
Then comes a generous sprinkle of freshly chopped nuts and artistic drizzles of chocolate syrup
The Critical Chilling Phase
Patience is key for the perfect finish:
I cover my masterpiece carefully with plastic wrap, making sure it doesn’t touch the surface
Then it’s into the refrigerator for at least 4 hours – though I prefer overnight for the best results
These detailed steps reflect my personal journey with this recipe, and following them will help you create a dessert that’s sure to impress.
Smart Storage Secrets: Making Your Banana Split Cake Last
My Proven Tips for Storing and Preparing Your Banana Split Cake
Over countless times making this favorite dessert, I’ve learned exactly how to keep it fresh and make it ahead without compromising quality. Let me share my tested storage methods and preparation strategies that ensure perfect results every time.
My Tried-and-True Storage Methods
Through years of experience, I’ve discovered the best ways to maintain freshness:
Perfect Refrigeration Technique – I always cover my cake tightly with high-quality plastic wrap or aluminum foil, ensuring no air pockets remain. This prevents the cake from absorbing other flavors and keeps the whipped topping pristine.
Optimal Freshness Window – In my experience, this cake maintains its best texture and flavor for 3-4 days when properly stored. I’ve found the bananas start to darken and the textures begin to change after this period.
Why I Never Freeze – Trust me on this one – I’ve learned the hard way that freezing drastically alters the texture of both the bananas and pineapple. The results are never quite the same, so I always recommend enjoying it fresh.
My Expert Make-Ahead Strategy
When I’m planning ahead for parties or gatherings, here’s my proven approach:
I often prepare the crust and cream cheese layer up to 2 days before the event. I’ve found this actually helps the flavors develop beautifully.
The fruit preparation timing is crucial – I always slice my bananas and prepare the pineapple right before assembly. This ensures maximum freshness and prevents any browning.
When I absolutely must prepare bananas ahead, I use my special trick: a light toss in fresh lemon juice. This prevents browning while maintaining the banana’s natural flavor.
For the whipped topping, I keep it tightly sealed in its original container. I’ve discovered this prevents it from picking up any unwanted refrigerator odors that could affect the cake’s taste.
These storage and preparation methods have become my holy grail for perfect banana split cake every time. Following these guidelines ensures your dessert will be just as impressive when served as it was when first made.
Creative Twists: My Favorite Banana Split Cake Variations
Four Incredible Ways I’ve Reinvented the Classic Banana Split Cake
Through countless hours of experimentation in my kitchen, I’ve developed several unique variations of this beloved dessert. Each version maintains the spirit of the original while introducing exciting new flavors that my family and friends absolutely love.
My Decadent Chocolate Lover’s Version
I created this variation for serious chocolate enthusiasts:
For the crust, I use chocolate graham crackers which add an incredible depth of flavor
I layer rich chocolate pudding between the cream cheese and banana layers
Before chilling, I generously sprinkle mini chocolate chips over the top for extra indulgence
My Fresh Strawberry Sensation
This bright, fruity version has become a spring favorite in my household:
I start with a vanilla wafer crust that provides the perfect subtle sweetness
Between layers, I spread homemade strawberry pie filling
Fresh strawberry slices on top not only look beautiful but add wonderful texture
My Peanut Butter Paradise
This crowd-pleasing variation combines two classic flavors:
I keep the traditional graham cracker crust but add a hint of cinnamon
Before the banana layer, I spread a generous layer of creamy peanut butter
Reese’s Pieces on top add both decoration and that perfect peanut butter punch
My Tropical Paradise Creation
When I’m craving something exotic:
I create a base from crushed coconut cookies that adds wonderful texture
Between layers, I add fresh mango puree for a tropical twist
The finishing touch is a sprinkle of toasted coconut and decorative pineapple rings
Each of these variations has been tested and perfected in my kitchen, and they’ve all become highly requested alternatives to the classic version. The beauty of these variations is that they maintain the beloved structure of the original while offering exciting new flavor combinations.
Why This Banana Split Cake Will Become Your New Favorite Dessert
Final Thoughts on My Journey with Banana Split Cake
After years of perfecting this recipe and exploring various versions, I can confidently say that banana split cake has become my most requested dessert at gatherings. What started as a simple experiment has turned into a signature dish that brings smiles to faces and creates lasting memories.
The beauty of this dessert lies in its versatility. Through countless iterations, I’ve discovered that while the classic version holds a special place in everyone’s heart, the variations I’ve developed offer exciting new possibilities. Whether you’re drawn to the rich decadence of the chocolate lover’s version or the tropical paradise creation with its exotic flavors, there’s truly something for every taste preference.
What I love most about sharing this recipe is seeing how others make it their own. Each time I serve it at a gathering, someone suggests a new twist or variation I hadn’t considered. That’s the magic of this dessert – it’s both a proven classic and a canvas for creativity.
Remember, the key to success lies in using quality ingredients and following the proper chilling time. Trust me, the wait is worth it. The moment you slice into those perfect layers and see the delighted expressions on your guests’ faces, you’ll understand why this dessert has become such a treasured part of my recipe collection.
So go ahead, start your own banana split cake adventure. I’m confident this versatile dessert will become a favorite in your household just as it has in mine. The possibilities are endless, and the rewards are absolutely delicious.
PrintBanana Split Cake
5 Stars 4 Stars 3 Stars 2 Stars 1 Star
No reviews
A no-bake dessert with layers of graham cracker crust, creamy filling, fresh bananas, pineapple, strawberries, and whipped cream—just like the classic ice cream sundae!
- Author: Hossain
- Prep Time: 20 minutes
- Cook Time: 4+ hours
- Total Time: 0 hours
- Yield: 12 1x
- Category: Dessert
- Cuisine: American
Ingredients
For the Crust:
-
2 cups (200g) graham cracker crumbs
-
½ cup (115g) unsalted butter, melted
-
2 tbsp sugar
For the Cream Cheese Layer:
-
8 oz (225g) cream cheese, softened
-
½ cup (100g) granulated sugar
-
1 tsp vanilla extract
For the Toppings:
-
3–4 ripe bananas, sliced
-
1 (20 oz) can crushed pineapple, well-drained
-
1 cup (150g) fresh strawberries, sliced
-
1 cup (240ml) heavy cream, whipped (or 8 oz whipped topping)
-
½ cup (60g) chopped walnuts or pecans (optional)
-
Maraschino cherries for garnish
-
Chocolate syrup for drizzling
Instructions
-
Make the Crust:
-
Mix graham cracker crumbs, melted butter, and sugar. Press firmly into a 9×13-inch pan. Chill for 15 minutes.
-
-
Prepare the Cream Cheese Layer:
-
Beat cream cheese, sugar, and vanilla until smooth. Spread over the chilled crust.
-
-
Layer the Fruit:
-
Arrange banana slices over the cream cheese.
-
Spread drained pineapple evenly over bananas.
-
Add a layer of sliced strawberries.
-
-
Top with Whipped Cream:
-
Spread whipped cream or whipped topping over the fruit.
-
Sprinkle with nuts (if using) and garnish with cherries.
-
Drizzle with chocolate syrup.
-
-
Chill & Serve:
-
Refrigerate for at least 4 hours (or overnight) before slicing.
-
Serving Suggestions:
-
Serve cold with extra cherries and a scoop of vanilla ice cream!
Notes
Pro Tips:
-
Prevent browning: Toss banana slices in a little lemon juice before layering.
-
Make ahead: Assemble up to 1 day in advance.
Storage:
-
Fridge: Up to 3 days (cover tightly).
Enjoy your Banana Split Cake!